Saturday, June 20, 2015

How to make strawberry shortcake...

Everyone loves strawberry shortcake - by using the angel food cake recipe I have provided and making your own homemade whipped topping your family is sure to be pleased!


Mix strawberries with 3 tablespoons sugar and refrigerate while juices develop, at least 30 minutes.
Preheat the oven to 400 degrees F.
Sift together the flour, baking powder, baking soda, remaining 2 tablespoons sugar, and salt in a medium bowl. Add heavy cream and mix until just combined. Place mixture in an ungreased 8-inch square pan and bake until golden, 18 to 20 minutes.
Remove shortcake from pan and place on a rack to cool slightly. Cut into 6 pieces and split each piece in half horizontally.
Spoon some of the strawberries with their juice onto each shortcake bottom. Top with a generous dollop of whipped cream and then the shortcake top. Spoon more strawberries over the top and serve.
Whipped Cream: Using a mixer, beat the heavy cream, sugar, vanilla, and lemon zest until soft peaks form, about 1 1/2 to 2 minutes.

Friday, June 19, 2015

Angel Lush Cake....

One of my favorite cakes for a light summer dessert is Angel Food Cake.  Everything about it screams summer!  It's light and airy and to be honest I think I could eat an entire one all myself.

I found this recipe on the JELL-O website and I have to tell you - it's absolutely fabulous.  You can make this as a whole cake or small personal desserts, but no matter how you serve it everyone will love it!
Image result for angel lush cake
 
Ingredients
1 can (20 oz.) DOLE Crushed Pineapple in Juice, undrained     
1 pkg. (3.4 oz.) JELL-O Vanilla Flavor Instant Pudding 
1 cup thawed COOL WHIP Whipped Topping
1 round angel food cake, cut into 3 layers 
10 small fresh strawberries
 
Directions
Mix pineapple and dry pudding mix. Gently stir in COOL WHIP.
Stack cake layers on plate, spreading pudding mixture between layers and on top of cake.
Refrigerate 1 hour. Top with berries.


Thursday, June 18, 2015

Homemade Whoopie Pies.....

Tonight I made the most delicious chocolate Whoopie Pies....I know most of you (unless you are from New England) are asking yourself "What in the world is a whoopie pie?" well it is similar to what the south refers to as a "Moon Pie."

The cake is a devil's food cake and the filling is a delicious whipped type icing. It's not exactly decorating a cake but you can get pretty creative with these.  They make great desserts to wrap individually and sell at a bake sale.

My plan for tonight was to roll the edges of the icing in some different types of candies...but I forgot to stop at the store to pick them up - so I will have to post those pictures tomorrow when I finish.

Here is my recipe for the most delicious Whoopie Pies....

Ingredients
             1/2 cup baking cocoa
             1/2 cup hot water
             1/2 cup shortening
             1-1/2 cups sugar
             2 eggs
             1 teaspoon vanilla extract
             2-2/3 cups all-purpose flour
             1 teaspoon baking powder
             1 teaspoon baking soda
             1/4 teaspoon salt
             1/2 cup buttermilk
Filling
             3 tablespoons all-purpose flour
             Dash salt
             1 cup 2% milk
             3/4 cup shortening
             1-1/2 cups confectioners' sugar
             2 teaspoons vanilla extract

Directions
1. In a small bowl, combine cocoa and water. Cool for 5 minutes. In a large bowl, cream shortening and sugar until light and fluffy. Beat in the eggs, vanilla and cocoa mixture. Combine dry ingredients; gradually add to creamed mixture alternately with buttermilk, beating well after each addition 
2.  Drop by rounded tablespoonfuls 2 in. apart onto greased baking sheets. Flatten slightly with a spoon. Bake at 350° for 10-12 minutes or until firm to the touch. Remove to wire racks to cool. 
3.  In a small saucepan, combine flour and salt. Gradually whisk in milk until smooth; cook and stir over medium-high heat until thick, 5-7 minutes. Remove from heat. Cover and refrigerate until completely cool. 
4.  In a small bowl, cream the shortening, sugar and vanilla until light and fluffy. Add milk mixture; beat for 7 minutes or until fluffy. Spread filling on half of the cookies; top with remaining cookies. Store in the refrigerator. Yield: 2 dozen.

Wednesday, June 17, 2015

How to make your own Fondant....

I have found that although fondant makes beautiful cakes - kids do not love the taste.  At my niece's first birthday party a couple years ago was my first experience with the fondant taste test. 

My niece's mother ordered a ridiculous sized birthday cake to feed the huge crowd of people - it was absolutely BEAUTIFUL!!  Gorgeous shades of purple and teal with the "owl" theme that has been so popular...and if you judge a cake by looks, this one was going to be tasty!

I took my son over to get his piece of cake and went to sit down with my nephews.  Everyone of them had pulled the layer of fondant off of their cake and moved it to the side.  I asked them why they weren't eating that part of the cake and my son replies "Mommy, why would anyone put rubber on a cake - it's gross!"

As I tried the cake I realized that although it was beautiful - it tasted horrible.  So now that I am into cake decorating I completely understand the need for fondant but how could I make it taste good enough for the kids to eat??? 

I have messed with a couple different options and have finally come up with a child approved fondant that I use on all my cakes - no matter the color!


Ingredients
16 ounces (454 g) mini marshmallows
2 tablespoons (30 ml) water
1/4 teaspoon (1.2 ml) salt
1/4 teaspoon (1.2 ml) lemon extract
2 tablespoons (30 ml) light corn syrup (helps with pliability)
1 teaspoon (5 ml) vanilla - clear
2 pounds (approx. 7 cups, 907 g) confectioner's sugar, sifted
1/2 cup (100 g) vegetable shortening
Gel colors if tinting fondant or white food coloring to create a true white

Directions

Grease microwave proof bowl and spatula with vegetable shortening. Pour marshmallows and water into bowl then microwave on high for approximately one minute. Stir well for about one minute. Continue to microwave on high in 30 second intervals until all the marshmallows are melted.
Take out of microwave and add remaining ingredients except powdered sugar. At this point you can add any gel colors to your fondant in order to create uniform color, including white coloring to get a true white color.

Add half the bag of powdered sugar and mix until you can't mix anymore! Turn the mixture out onto the other half bag of powdered sugar you mounded on your counter.

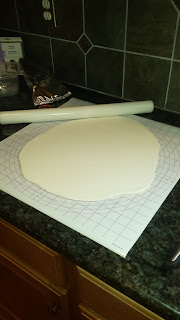
Slowly knead the dough working from the outside in. Knead until you incorporate most all the powdered sugar.

Rub your hands with a generous amount of vegetable shortening and begin kneading the fondant until it's not coated in powdered sugar anymore and it becomes smooth. Continue to add a little vegetable shortening until it's pliable and smooth.

Coat again with vegetable shortening and wrap up in two layers of plastic wrap and then place in a zip lock bag overnight to rest.

Tuesday, June 16, 2015

Angel Food Cake with Cherry Glaze

One of my all time favorite summer desserts is Angel Food Cake, it's light and sweet.  Adding just a little bit of cherry flavor to it makes it that much more amazing.

Ingredients you will need:
1 1/4 cups egg whites (approx. 9)
1 1/2 cups sugar, divided
1 cup cake flour
1 1/4 teaspoons cream of tartar
1 teaspoon vanilla extract
1/4 teaspoon almond extract
1/4 teaspoon salt
1 small jar of maraschino cherries
3 tablespoons powder sugar

Directions

Place egg whites in a large bowl; let stand at room temperature 30 minutes. Sift 1/2 cup sugar and flour together twice; set aside.
Place oven rack in the lowest position. Preheat oven to 350°. Add cream of tartar, extracts and salt to egg whites; beat on medium speed until soft peaks form. Gradually add remaining sugar, about 2 tablespoons at a time, beating on high until stiff peaks form. Gradually fold in flour mixture, about 1/2 cup at a time. Drain juice from cherries and place in a separate bowl (you will need this later). Dice cherries into small pieces (your desire) and mix into cake batter.
Gently spoon into an ungreased 10-in. tube pan. Cut through batter with a knife to remove air pockets. Bake 35-40 minutes or until lightly browned and entire top appears dry. Immediately invert pan; cool completely, about 1 hour.  Mix cherry juice with powered sugar until sugar is completely incorporated.
 
Run a knife around side and center tube of pan. Remove cake to a serving plate. Pour cherry syrup over the top of the cake and serve.
 
This dessert is amazing....I hope you enjoy

Monday, June 15, 2015

How to cover a round cake with fondant....

Well I tried to make a video on the how to's with fondant.... it was a disaster! This video will give you all the tips and tricks you need to cover a round cake.  I found it to be very helpful when I was struggling with the correct measurements for my fondant.

Sunday, June 14, 2015

Buttercream Basics: How to Make A Buttercream Rose


Finding Cake Tutorials...

I have found it much easier to watch and view tutorials, rather than reading instructions from a cook book.  There are many different websites to view but I found Melissa Diamond's, My Cake School, online.  It has been one of my most favorite sites to get helpful information from.

Wednesday, June 10, 2015

Baking Help....

6 Baking Tips for Flawless Cakes

Try these foolproof techniques, brought to you from the Real Simple test kitchen.

Tuesday, June 9, 2015

M&M Cake

I am sure everyone has experienced the desire to recreate something you have seen on Pinterest at one point or another.  Well my son was getting ready to turn 9 years old and wanted a "different" kind of birthday cake.  He has had the superhero cakes and the Pokémon cakes but he wanted something just different this year.

On to Pinterest we went...What should we choose?!  And then he found it - an M&M birthday cake.  It wasn't just your ordinary cake - this one was HUGE!!

It took me an entire day to decorate and piece it together.  I must say - this cake turned out amazing.

The M&M's were completely edible.  I created them out of Rice Krispy Treats and chocolate dipped them to smooth out the bumps - then I coated them with fondant.

The rest was just paying attention to the details and hoping for a great looking and tasting cake in the end! 

It was a huge success!! and everyone was able to take some to go.


Monday, June 8, 2015

Tools

So like everything in life, you have to have the right tools to make things easier.  Here are some items in my kitchen that have made the world of difference.


Kitchen Aid Mixer - Now I have to tell you, I have not always had one of these fine pieces of machinery.  This was a Christmas present this past December, but knowing what I know now I would never purchase anything else.  I have been through four, yes four, stand up mixers making only frosting.  I am sure I have not pushed the limits on this brand yet but I noticed an immediate difference.  So if you are in the market for a new mixer be sure to check this brand.

Wilton - This company has all of the finest tools that you would need for decorating a cake.  It doesn't matter if you are decorating once a year or once a week - all the tools they have are simple to use and have key tips provided in the instruction manual.

Wilton Cake Courses - check out your local arts and craft store for a listing of cake decorating classes.

Sunday, June 7, 2015

The Best White Cake Recipe

The Best White Cake Recipe
This cake has quickly become one of my favorites, it's easy to make and is always delicious.  The best part about it is you can add flavors to create a lemon, strawberry and even salted caramel cake.
This is a simple recipe that is easy to follow and always yields a moist light white cake that everyone will love.
Ingredients:
1 cup of butter (2 sticks)
1/2 cup vegetable shortening
3 cups granulated sugar
3 cups all-purpose flour
5 eggs, room temperature
2 teaspoons baking powder
1/4 teaspoon salt
1/2 cup whole milk, room temperature
1/2 cup buttermilk, room temperature
2 teaspoons vanilla extract
Instructions:
1. Preheat oven to 350 degrees.  Prepare three 9-inch round cake pans with nonstick baking spray
2. Cream together shortening and butter until light and fluffy with an electric mixer
3. Slowly add sugar one cup at a time, making sure to fully incorporate each cup before adding another
4. Add eggs one at a time, making sure to fully incorporate each cup before adding another
5. Sift together flour, baking powder and salt.  Set aside
6. Pour whole milk, buttermilk and vanilla into a measuring cup and whisk together with a fork
7. Alternate adding flour and milk mixture to the butter and shortening mixture, beginning and ending with flour mixture
8. Gently stir all ingredients until well combined.  Stop mixer and scrape down the sides and bottom of the bowl to be sure all ingredients are mixed well
9. Evenly distribute cake batter into each of the three prepared cake pans and place in oven.  Bake for 25-30 minutes or until toothpick comes out clean
8. Allow cakes to cool completely before frosting

Saturday, June 6, 2015

Ding Dong Cake

Don’t let the recipe scare you off. This is a really easy recipe! You probably have all the ingredients in your pantry. Bake your 2 cake layers, then stack them with all the cream filling. You want all that filling in there. Then the Ganache.
And when the ganache is set…You’ve got a perfect cake. I don’t know if I’ll ever be able to top this cake. Moist, rich, deep flavored chocolate cake. The cream filling is like whipped cream but thicker (it’s made with milk not cream) the best way to describe it is a cross between a buttercream and a whipped cream.
And of course the ganache. That soft chocolate outer coating that seals everything together
Ingredients
for the cake
    • 3 ounces semi sweet baking chocolate (you can use chocolate chips)
    • 1 1/2 cups brewed coffee
    • 3 cups sugar
    • 2 1/2 cups all purpose flour
    • 1 1/2 cups unsweetened cocoa powder
    • 2 teaspoons baking soda
    • 1 teaspoon baking powder
    • 1 teaspoon salt
    • 3 eggs
    • 3/4 cup vegetable oil
    • 1 1/2 cups buttermilk, room temperature
    • 1 teaspoon vanilla
for the cream filling
    • 5 tablespoons all purpose flour
    • 1 cup milk
    • 1 teaspoon vanilla
    • 1 cup butter
    • 1 cup granulated sugar
for the ganache
  • 1 12 ounce bag semi-sweet chocolate chips
  • 1 cup heavy cream
  • 1 tablespoon butter
Instructions
for the cake
    1. Chop chocolate so no pieces are larger than a chocolate chip. Place chocolate in a medium bowl or a 2 cup measuring cup and pour hot coffee over chocolate. Let sit for 5 minutes then stir, making sure all chocolate is melted and well combined with coffee. Set aside to cool.
    2. Sift all dry ingredients together-sugar, flour, cocoa, baking powder, baking soda and salt.
    3. In the a large mixing bowl (or the mixing bowl of your stand mixer) beat eggs on medium speed until frothy.
    4. Slowly add oil, buttermilk, vanilla and chocolate-coffee mixture to eggs, beating well to blend.
    5. Add in sugar/flour/cocoa mixture, one cup at a time, mixing just to combine after each addition.
    6. Pour batter into 2 9 inch cake pans that have been well greased and lined with parchment paper on the bottom.
    7. Bake in a preheated 325 degree oven for 45-50 minutes, using toothpick to test for doneness.
    8. Let cakes cool completely in pan. Using a plastic knife, run knife around edges to loosen before turning out onto rack or plate.
for the cream filling
    1. Pour cold milk into a small saucepan. Before turning on the heat, whisk in flour so no lumps remain. Turn heat on to medium low, and stirring, heat until mixture is thick, like a roux. Remove from heat, stir in vanilla and let cool completely.
    2. Cream together butter and sugar on medium high speed, until fluffy, about 8 minutes.
    3. Add in the milk mixture and beat again until mixture resembles a whipped cream.
to assemble
    1. Place one layer of cake on an 8 inch cake circle, top side down. Cover with a thick layer of cream filling then place top layer of cake, top side down, on top of filling gently pressing down to secure layers. Place cake on a wire rack on top of a wax paper lined cookie sheet.
ganache
  1. Place chocolate chips in a large measuring cup.
  2. Heat cream and butter in a medium saucepan over medium heat until boiling, careful not to scorch.
  3. Pour heated cream over chocolate chips and let sit for 5 minutes. Stir chocolate to make sure completely melted and smooth.
  4. Slowly pour ganache over top of cake, letting it drip down the sides. If needed use a spatula to help spread ganache on top over sides.
  5. When ganache is set, cake can be transferred to a serving plate.
  6. Chill cake for 4 hours before serving.

Friday, June 5, 2015

Ree Drummond's - Big Chocolate Birthday Cake

Big Chocolate Birthday Cake
I have to share with you my all time favorite chocolate cake.  This is a recipe from Ree Drummond off of Food Network - Big Chocolate Birthday Cake
This is one of those desserts that is not only great for birthdays but also for any occasion.  My husband and son request this when they are in the mood for chocolate.  And as rich as it is - you will definitely need milk to wash it down.  The name of this recipe is not underestimating its size either, it makes FOUR 9 inch pans worth of batter.  It stands very tall so if you are commuting this cake you better use a dowel or two to hold it together.
Ingredients
Directions
For the cake: Preheat the oven to 350 degrees F. Heavily grease and dust with cocoa four 9-inch round cake pans.
In a mixing bowl, combine the flour, sugar and salt.
In a saucepan, melt the butter. Add the cocoa. Stir together. Add the boiling water, allow the mixture to boil for 30 seconds and then turn off the heat. Pour over the flour mixture and stir lightly to cool.
Combine the buttermilk, baking soda, vanilla and beaten eggs. Stir the buttermilk mixture into the butter/chocolate mixture.
Divide the batter among the prepared cake pans and bake for 20 minutes.
Cool completely before icing. Refrigerate the layers after cooling for best results.
For the frosting: Heat the cream until very hot, and then pour over the chocolate pieces. Stir to completely melt, and then pour into the bowl of an electric mixer. Refrigerate to cool.
Once completely cooled, add the vanilla and beat with an electric mixer until light and airy.
Frost the cake in between each layer, on the top and around the sides.

Thursday, June 4, 2015

Frozen Birthday Cake


Frozen CakeThis cake must have weighed 100 pounds.  Now realizing that it was for both of my nieces birthdays and the number of people we were expecting, I figured go big or go home.  And BIG it was. 

This cake was three layers of white cake on the bottom and three layers of chocolate cake on the top.  I used fondant on the exterior of the cake to help hold the snowflakes onto the sides.  Also fondant seems to be more forgiving than frosting.  I created each and every snowflake with fondant and used gum paste to "glue" them to the exterior of the cake.

It turned out amazing and make my sweet little nieces very happy.

Wednesday, June 3, 2015

Pokemon Cake

cropped-img_1017.jpgMy son is a huge Pokémon fan.  For his eighth birthday he asked for me to create a Pokémon Black and White cake.  What in the world?  So I did a little online searching to find out what exactly he was asking for.

The design I came up with was from a few different cakes I had seen online. My thought was that this would be relatively simple.  I used a rectangle cake pan that would be large enough for me to fit the characters and a bowl to create the Pokémon Ball. 

By using fondant I was able to create this masterpiece.

Some helpful hints:

Do not let the fondant get wet around the edges – the color will bleed onto the white.  Creating a mess!

Keep your hands greased with vegetable shortening – this keeps the fondant pliable and it will not stick.

BE PATIENT!  It may not come out perfect but everyone will be impressed with your efforts.

Tuesday, June 2, 2015

Overwhelmed at the thought of decorating?

Does the thought of baking and decorating cakes or cupcakes seem overwhelming?  Don't let it!  I had been intimidated by cake decoration forever.  When it came to making cakes I left it to professionals - they always look so fabulous.  But then my mom had mentioned an interest she had in decorating cakes so I thought it would be a great idea if she and I took a class together.  It was amazing that after one night of class I could actually make frosting and ice a cake - without crumbs! 

Cupcake Birthday Cake

If you are interested in decorating cakes and would like to take a class then I highly recommend contacting your local arts and crafts store and ask about the Wilton cake decorating classes.

Don't worry about perfection, it gets much easier with practice.